How to Vinyl Wrap a Motorcycle: A Step-by-Step Guide
Vinyl wrapping a motorcycle is a cost-effective way to personalize a bike's appearance or protect its original paintwork. The process involves applying large sheets of pressure-sensitive vinyl onto the motorcycle's body panels. Not only does this allow for a wide array of design options and finishes from matte to high-gloss, but it also serves as a protective layer against the elements and minor abrasions.
For motorcycle owners that are looking to vinyl wrap their bike, patience and precision are key to achieving a professional finish. The task requires a careful approach to avoid air bubbles and wrinkles, necessitating the use of specific tools and techniques. Motorcyclists can select from a spectrum of colors and textures to create a look that's as unique as the rider themselves. Wrapping a bike is not purely cosmetic; it's a practical choice for those wanting to maintain the value and condition of their motorcycle.
Prepping Your Bike for the Wrap

Preparing a motorcycle for vinyl wrapping is a critical step that requires attention to detail. The preparation process ensures that the vinyl adheres properly and looks professional once applied.
Materials Needed:
- Microfiber cloth
- Isopropyl alcohol
- Screwdrivers and wrenches
One should start by performing a thorough clean of the motorcycle. It is crucial to remove any dirt, grease, or wax as these can prevent the vinyl from sticking correctly. Using a lint-free cloth and isopropyl alcohol, one must wipe down the surface to ensure it is spotless.
Disassembly is the next important step. One must remove parts such as mirrors, seat, and any other components that might get in the way during the wrapping process. This step will provide easier access to the bike’s contours and edges, making the job of applying the vinyl smoother.
Surface Inspection:
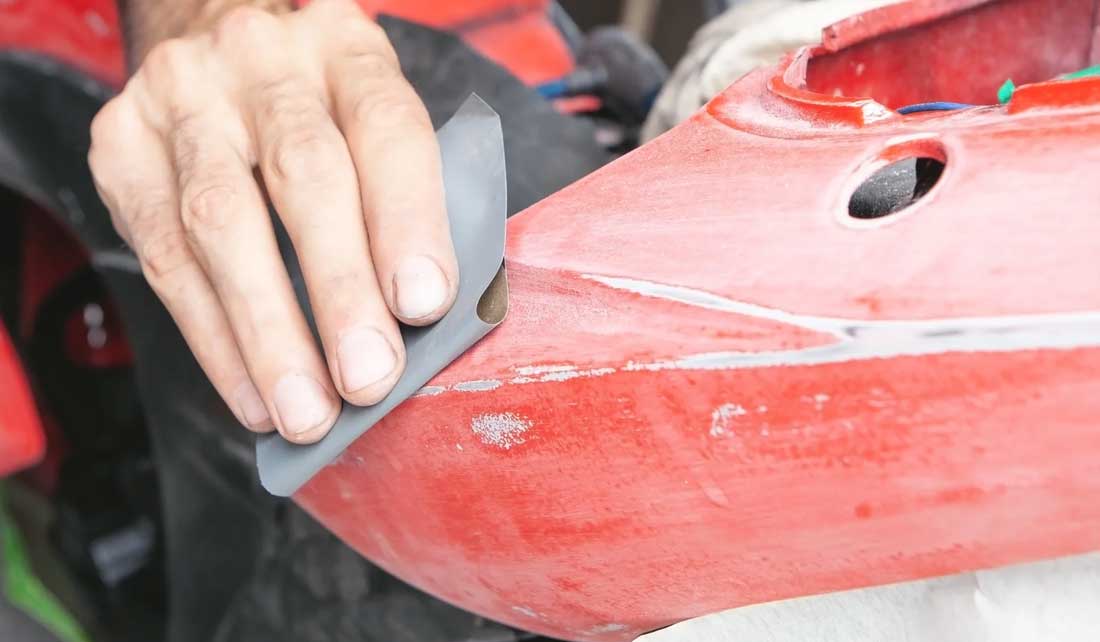
Before one begins wrapping, it is important to inspect the bike's surface. Any scratches or dents should be dealt with accordingly. If these imperfections are not addressed, they may show through the vinyl wrap.
Lastly, you should tape off any areas that do not require wrapping. This protects these sections from the vinyl adhesive and makes the cutting and application process more precise.
By following these steps diligently, your motorcycle will be well-prepped and ready for the vinyl wrapping process.
Gathering Your Tools and Materials

Before one begins the process of vinyl wrapping a motorcycle, ensuring that all necessary tools and materials are at hand is crucial. Here is a breakdown of what one will need:
- Vinyl Wrap: The market offers various brands, but using high-quality materials such as 3M vinyl wrap is often recommended for its durability and ease of installation. The amount depends on the size of the motorcycle and the number of components to be wrapped.
- Utility Knife: A sharp blade is necessary for precision cutting of the vinyl wrap.
- Heat Gun or Hair Dryer: Required for molding and stretching the vinyl wrap around curves and edges.
- Squeegee: Helps in smoothing out the vinyl and eliminating air bubbles.
- Cleaning Supplies: Isopropyl alcohol or a mild cleaning solution and a clean cloth are used to ensure the surface is free of contaminants before application.
- Gloves: Optional, but wearing gloves can prevent fingerprint marks and provide a better grip.
It's important to gather all tools and materials beforehand to ensure a smooth workflow. For specific items, here are additional suggestions:
| Tool/Material | Purpose | Notes |
|---|---|---|
| Large picture frame | Ideal for wrapping tanks; offers a flat surface for work | Only needed for tank wrapping |
| Alcohol Wipes | Cleaning the motorcycle parts before application | Essential for an unblemished finish |
| Detailing Tape or Magnets | To hold the vinyl in place while applying | Magnets are helpful on metallic parts |
The initial investment in the right tools and materials can make the difference between a professional-looking finish and a wrap that is likely to fail prematurely. It's also beneficial to consider the workspace environment, ensuring there is enough room to maneuver and that the temperature is conducive to the vinyl adhesive's optimal performance.
Carefully Applying the Vinyl Wrap

Applying a vinyl wrap to a motorcycle requires meticulous attention to detail and patience. The process ensures a smooth, bubble-free finish that can transform the appearance of the bike.
Preparation: Before beginning, one must ensure the motorcycle's surface is clean, dry, and free of any grease or wax. A meticulous cleaning process with appropriate solvents is crucial.
Tools Required:
- Squeegee
- Heat gun or hairdryer
- Utility knife
- Microfiber cloth
Application:
- Measure and Cut: Measure the vinyl slightly larger than the area to be covered; this allows room for error.
- Positioning: Carefully position the vinyl on the desired surface area without removing the backing entirely.
- Adhesion: Peel the backing paper away gradually; use the squeegee to smooth the vinyl onto the surface, pressing from the center outwards to eliminate air bubbles.
- Heating: Gently heat the vinyl with a heat gun while stretching it for a snug fit around curves and edges.
Finishing Touches:
- Once applied, make precise cuts along edges and remove the excess material.
- Post-heat the applied wrap to ensure strong adhesion, passing the heat gun over the entire surface.
The process requires careful handling and should not be rushed. Make sure that you take their time to avoid creases and to achieve the best possible finish.
Tips and Tricks for a Flawless Finish

When vinyl wrapping a motorcycle for a polished appearance, preparation is paramount. Begin by thoroughly cleaning the motorcycle, ensuring the surface is free from dirt, grease, and wax. The cleanliness of the surface is critical, as any contaminants can cause imperfections in the wrap.
Temperature also plays a vital role. The environment should be ideally between 60-80°F (15-26°C) so that the vinyl is pliable but not overly soft. If the vinyl is too cold, it may not stretch properly; if too hot, it may become too elastic and difficult to handle.
Utilize a high-quality squeegee to smooth out the vinyl and prevent air bubbles. Employing a heat gun with careful precision allows the material to contour around complex shapes and curves, but be cautious not to overheat and cause damage to the vinyl.
Patience is crucial when working with vinyl. Take the time to apply the wrap slowly, working in small sections and using a low-friction tape for intricate areas. Trimming should be done with a sharp blade, ensuring cuts are made with precision to avoid tearing or an uneven edge.
In some cases, using a large picture frame can assist when wrapping tanks, providing a structure to help manage the material. For detailed steps on the process, you can refer to the tutorial from The Girl on a Bike.
Remember, even after the vinyl is applied, it will require a post-installation heat treatment to secure the adhesive and prevent peeling. This final step ensures a lasting, smooth finish for your motorcycle's new look.
Post-Wrap Care and Maintenance

After successfully applying a vinyl wrap to a motorcycle, maintaining its condition is essential to ensure longevity and aesthetics. Here is a concise guide to post-wrap care and maintenance:
-
Cleaning: Regular cleaning is vital. Use a gentle, automotive-specific cleaner and a microfiber cloth to avoid scratching the vinyl. Avoid harsh chemicals or rough materials that could damage the wrap.
- Frequency: Once a week or when the motorcycle is visibly dirty.
- Products: Use a mild soap and water solution or a vinyl-specific cleaner.
-
Storage: It's advised to store the motorcycle indoors or under a protective cover when not in use. This prevents prolonged exposure to sun, rain, and pollutants, which can degrade the vinyl over time.
- Ideal Conditions: Cool, dry, and away from direct sunlight.
-
Sun Exposure: Minimize the motorcycle’s exposure to direct sunlight. Over time, UV rays can fade the vinyl. Consider using a UV protectant spray to extend the wrap's vibrancy.
- UV Protectant: Apply as instructed on the product's label.
-
Scratch Prevention: Be cautious to avoid scraping or scratching the wrap. Although vinyl is durable, sharp edges or rough handling can cause unsightly marks.
- Careful Handling: Pay close attention when near the motorcycle's wrapped surfaces.
By following these guidelines, one can ensure their motorcycle’s vinyl wrap remains in excellent condition. Regular attention to detail and adherence to these maintenance steps will help keep the wrap looking its best.
Conclusion
Vinyl wrapping a motorcycle is a detailed process that can transform the appearance of a bike, offering a customized look while also providing a layer of protection to the underlying paint. Riders should invest time in planning their design and selecting the right materials. High-quality vinyl, such as 3M products, are recommended for their durability and finish.
The steps involved in wrapping a bike are precise and methodical. It's essential to thoroughly clean the motorcycle's surfaces with isopropyl alcohol and apply the vinyl carefully to avoid bubbles and wrinkles. Tools like a heat gun or hair dryer, a felt pad or squeegee, and a precision blade contribute to a successful application.
A successful vinyl wrap installation hinges on attention to detail and patience. The process may be time-consuming but can be gratifying when performed correctly. Motorcycle owners can either take on this project at home, as guided by resources like step-by-step tutorials, or seek professional assistance for optimal results.
When completed, maintaining the vinyl wrap involves regular cleaning and avoiding harsh chemicals that can damage the material. With proper care, motorcycle wraps can last for years, making it a worthwhile venture for bike owners looking to personalize their rides.
- Choosing a selection results in a full page refresh.

